Sunday 23 December 2018

I-Zink Snowflake


     This card was made using I-Zink droppers on acetate, with a twist. The droppers come in a variety of colours, some are pearlescent too.
     The acetate is coloured when the inks are dropped on one sheet and another sheet is 'squished' on top of that, it's a bit like making ink blots but with acetate instead of paper. Once pulled apart, when still wet, the result is two pieces of unusually patterned acetate.
     The twist for this one was a die cut snowflake made from masking sheet was added to one piece of acetate before using the inks, the fun came when I tried to peel the masking sheet off without messing up the snowflake, but it worked.
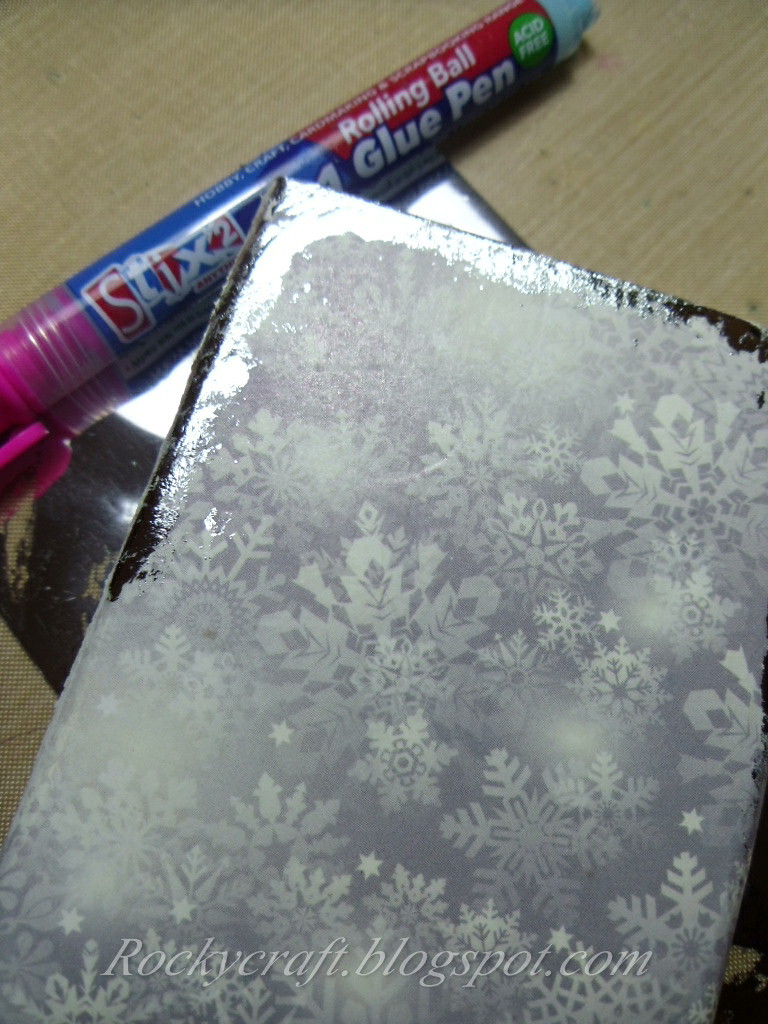
     Having masked off part of the acetate I had some clear area showing so my backing card had to be something simple but special, for a snowflake this had to be white and sparkly.
     Sticking acetate down can be tricky, the adhesive has to be strong and invisible. Double sided sticky sheet is perfect for this, nice and strong and with an all over sticky there are no marks showing.
      The white glitter card was cut just a little larger than the acetate so there would be a sparkly mat layer before going on to a purple mat to bring out the odd bits of matching colour in the inky background.
      Using some white texture paste and a stencil I added some randomly placed snowflakes over the card and sprinkled them with iridescent glitter. The greeting was stamped and embossed in silver, then die cut with a hole in the middle and mounted on foam pads to show the tiny snowflake underneath.
     

I would like to enter this card in the following challenges:
International Art & Soul - Add Some Sparkle
Winter Wonderland - Anything Christmas
Creatalicious - Christmas Snowflakes

Friday 21 December 2018

More Mistletoe Magic


     Mistletoe has featured quite a lot in my cards this year, all because Lavinia Stamps have a gorgeous stamp that is also available in a stencil and die from Sweet Poppy.
      The stamp is smaller than the stencil and die so makes for some easy batch making of A6 cards. When cards are batch made by hand they will always come out a little different so I don't feel it's cheating atall.
      Using watercolour card I stamped and embossed in white, then spritzed the card with water before lightly sprinkling Brusho over the card. Once dry I felt the edges needed a little definition, so I used Distress ink to add a touch of darker green all the way around.
      For the Brusho panels I used some gold paper and a little dark green card to mat and layer them.
     The panels looked a little odd on a plain white card so i used the stamp and some gold ink to stamp all around the edge before adding the panel.
      To finish off I added some tiny half pearls as berries and a small gold organza bow, after watching some YouTube videos I bought a nice fork in a charity shop that I now use just for tiny bow making.
      For the other two cards I stamped the same image on to white card and embossed with a dark green powder. I used the same card and paper as before but switched it around so the green was first and then the gold.
      Again I used the stamp to decorate the white card blank but this time using a very pale green. They also have tiny pearls and a little bow.
      Both card styles have the same greeting, just embossed with different colours and die cut with a small oval die, then mounted on thin foam pads.
      This is one stamp that won't be put away in the Christmas stash, upside down it looks like seaweed so I can use it all year round. I've really enjoyed making these cards so the Christmas stash will probably stay out for a while longer so I can get a head start on next year!


I would like to enter these cards in the following challenges:
ABC Christmas - Y~ Your Favourite Thing   (a stamp with multiple use)
      Christmas At Sweet Stampin' - Anything Christmas
The Holly and Ivy - Anything Christmas 
The 12 Months of Christmas - Anything Christmas

Tuesday 18 December 2018

Mistletoe Paste


     My apologies for a quiet blog these last few weeks, things here have been very busy, sadly not all of it creative but that's life. Crafting can be the most therapeutic pastime for many of us, so over the next few days I'll share some of my creations and spend some time drifting around blogland catching up with everyone else's festive posts.
     I spent a wonderful day with friends visiting Sweet Poppy Stencils for an open day, which is where I bought this gorgeous stencil...and a few others, well it would have been rude not too, right?!
     This image is silver paste on black card, one thing I learnt on the open day is it is much better to have a magnetic sheet under your card and stencil when spreading the paste.....can't believe I didn't think of that before! The other thing I have discovered is not all stencil/masking tape is the same, Stix2 stencil tape is absolutely brilliant, it holds firm but comes off without a single snag on the card.
     Once the paste was dry I mounted it on a green pearl card, the mirri layer is also a very pale green, it didn't look right flat so I used a snowfall embossing folder to give it some texture.
     The last thing to go on once all the layers where done was a sprinkling of half pearls for the mistletoe berries and a silver bow cut with a Sizzix die. There is no greeting on the outside of this card as I felt it would spoil the image, it will also be hand delivered so it doesn't get squashed.


I would like to add this card to the following challenges:
Christmas Cards All Year Round - Anything Christmas for December
CraftyHazelnut's Christmas - Anything Christmas
52 Christmas Card Throwdown - 2017 challenge : June Gems/Pearls/Sequins

Saturday 1 December 2018

House Of Cards Blog Hop


     It's sad to think that this will be last card I make for House Of Cards, the challenge is closing this month so please pop over and join us for one last time, we have a blog hop with a prize kindly donated by Beccy's Place.
   
      When I saw the photo prompt I thought this would make a great masculine Christmas card. Having just invested in some more Tim Holtz stencils I was itching to use them, the pattern on the plate made me think of plaid, oh what luck I just bought that one!
      With Distress Ink Black Soot and the Plaid stencil I inked up a square of white card for my background. The stencil only covered half the card but with a bit of careful positioning and some clean masking tape I managed to repeat the pattern so you can't see the join.

     The image I chose to use from Beccy's Place is called Champagne, it has three strawberries in front of the ice bucket, very nice but not quite right, so I die cut some baubles to cover them.
     The image is coloured with watercolour pencils and a touch of metalic pen, the glasses have a slight blue tinge to them that doesn't show up well in the photograph.
     The tiny baubles are part of the Merry greeting, so I used the dark red bauble frame that was left over to hang at the top of the image panel, then filled it with the bauble from the gold greeting cut.
      The image panel was stuck on to a dark red pearl mat layer, the same card used for the baubles, this went on to the plaid background and then the gold greetings were added, with the gold frame bauble filled with red to match the ones at the bottom. I was going to add a fir branch too but I think it's busy enough as it is.
      Please come and play along with our final challenge at House Of Cards, you never know, you may win the prize.

House Of Cards Blog Hop
Make sure you leave a comment at each person's blog along the way because the prize is hidden and we'll be doing a random drawing from the blogs where it is hiding! :) 

You have come from Michele and your next stop is Rosi, good luck.

I would like to enter this card in the following challenges:
Digi Choosday - Anything Goes


Snow blind


     Making Christmas decorations is one of my favourite things to do, so when I found a huge roll of vertical blind fabric and some broken chandelier pendants in a charity shop I thought snowflakes.
      This fabric is amazing stuff, it doesn't fray when cut, you can stamp on it, heat emboss on it and alcohol markers don't bleed when you colour on it. A good thing it's so very versatile when you see the size of the roll!
      Using Tim Holt Sizzix die Layered Snowflake I cut four flakes and embossed them with the folder that accompanies the die.
      Once cut and embossed I used some silver gilding polish to run over the raised areas, this looked good but it lacked something, so out came the iridescent glitter.
     Using some fishing line I threaded it through one of the single round gems and made a loop which was sealed with a crimp bead. Most of the gems have small hooks and loops on them so assembly was easy.
      I glued two of the flakes together on one side to form half of the finished flake. Then I glued the longer end of the fishing line to the centre channel, making certain to have enough to form a finishing loop before cutting it off the reel.
      With the loose end of the line I threaded on a small round gem attached to a drop gem, making a loop through the top of the gem and fixing again with a crimp bead. The end of the line was then stuck inside the channel so there would be no end visible.
      With the gems in place I stuck the remaining flakes to the made half and left it to dry before easing into shape as a three dimensional snowflake. The weight of the glass gems make the flake hang straight and the whole thing sparkles beautifully.
     Over at Altered Eclectics we love to see altered art and recycled projects like this so please pop over and join us with your creations.


I would like to enter this decoration in the following challenges:
CraftyHazelnut's Christmas - Anything Christmas Goes
The Holly and Ivy - Anything Christmas Goes
Scrapy Land - Anything Goes
Fussy and Fancy - Winter/Christmas
Crafty Cardmakers - Anything But A Card


Wednesday 7 November 2018

A Touch Of The Jackson Pollocks


     The new challenge at The Male Room is to make a masculine project inspired by a famous artist, I thought something on a Jackson Pollock theme would be fun to make.....and it was!
   
     I started with some dark blue card, then I flicked paint at it until it looked like a decorators boot.
     With such a busy background I had to think of something simple for the image or sentiment, a die cut seemed the way to go. This turned out to be a bit more complicated than I planned, I hadn't realised the die I chose had so many tiny cut outs. Trying to put all the cut away pieces back onto the silver mirri was a nightmare, even using the die as a guide.
   
     The only thing for it was to die cut another sentiment, stick that in place and then add all the little cut away bits. Most of them were easy to work out but once I accidentally mixed the bits up it became a bit more of a puzzle.
     Eventually it all came together and the blue mirri sentiment looks at home tucked into the splatter background.
     Please pop over to The Male Room blog to see some of the amazing inspiration the DT have come up with, I can honestly say this challenge stretched my imagination.

I would like to enter this card in the following challenges:
Unicorn - Use a Sentiment
Crafty Cardmakers - Explosion Of Colour  (I got the expolsion bit right!)
Dream Valley - Use Dies and Punches
Simon Says Stamp (Monday) - Make Your Own Background

Thursday 1 November 2018

Feather Tree In The House Of Cards


     The new challenge at House Of Cards is to use gold and pearl accents, I have also tried to use some of the inspirational colours on the swatch on this Christmas card.
     I was shown the most gorgeous tree made with Lavinia's feather stamp, I have tried to make something similar but it isn't as pretty as the one I saw, I'll just have to keep trying!
     This one is stamped and embossed in gold on cream card, the edges are coloured with Distress Old Paper and I have tried to give the tree a little ground to stand on too.
     The image was then matted and layered with dark blue and gold before going on a cream 7x5 card blank. I left the addition of the pearls until the image panel was mounted so I could still get it in my trimmer.
     After adding the pearls I had to make a small organza bow as I didn't have one ready made, I coloured white ribbon with an alcohol marker and then used a fork to tie my bow, again something that I need to practice more! Although I used an alcohol marker I still didn't want to use wet glue...just incase, it's been one of those weeks...so I used a small glue dot to fix the bow on the card.
     A relatively simple card to make with a gorgeous feather stamp, two uses for this stamp so far and counting, don't you just love value for money.
     Please come and join us at House Of Cards with you creations, they don't have to be Christmas cards, any occasion as long as you follow the theme.


I would like to enter this card in the following challenges:
Christmas At Sweet Stampin' - Anything Christmas Goes
Cardz 4 Guyz - Into The Woods
Sparkles Christmas - Embossing Heat or Dry
CraftyHazelnut's Christmas - Anything Christmas Goes

Winter Straw Cabin


     A little more recycling at Altered Eclectics this month, a little house decorated ready for Christmas.   
         Over the last few months I have spent many hours rolling paper straws, if you make a few each day it soon mounts up, now I have a small stash to play with.
      There are lots of amazing pictures on Pinterest that show you how to make wonderful things with paper straws, that's where I found this one.
      After I had made the house I painted the bottom brown and the roof white, a little glitter was added to the roof to make it sparkle.
     Another thing I have been collecting for a while are fir cones, so a quick rummage in the box and I found three small ones that I could stick on the house with hot glue. It really needed some colour so I found some felt holly leaves and glued a couple of those on aswell. All that remains is to add some twine to the back so the house can be hung up.
     If you like making altered art or recycling items then please come and show us at Altered Eclectics, we would love to see you work.

I would like to enter this house in the following challenges:
Crafty Creations - Anything Goes
Lemon Shortbread - Anything Goes
The Holly and Ivy - Anything Christmas Goes
The Merry Christmas - Anything Christmas

Monday 1 October 2018

Coffee and Cousins In The House Of Cards


     Our challenge at the House Of Cards this month is for Autumn flowers and/or the colour on our photo swatch. I was inspired by the photo and a recent visit by my cousin who came bearing sunflowers, they really did brighten up the kitchen.
      I found a patterned paper topper with sunflowers all over it and decided it was just what I wanted to use. I die cut a scalloped oval in the centre rather than add a mat layer on top, it also gives me a gorgeous sunflower oval for another card.
     This flower layer was then mounted on dark brown pearlescent card before going on to a narrow layer of gold. I searched high and low for the right shade of green for the centre oval, why is it that you never have 'just' the right shade in all those greens?!
     Search over I used a stencil and Versamark to then gold emboss the coffee cup, then I cut it out, it is stuck flush to the card.
      The image panel and all it's layer were added to a 5x7 cream card blank but it lacked something, it needed a sunflower.
     The flower was die cut in thin yellow card, the centre darkened with Distress ink and the two layers of petals stuck together. For a nice furry centre I have coloured a loop disc of velcro with alcohol markers, it worked so well I shall be making more of these.
     The flower was stuck on with PVA glue, it will flatten for posting so it will still be a standard postage charge.
     Please come and join us at House Of Cards with your Autumn flower inspired cards, we would love to see what you make.


I would like to enter this card in the following challenges:
Allsorts - Autumn Glory
Crafty Friends - Autumn Colours
Crazy 4 Challenges - Anything Autumn
My Time To Craft - Food and Drink

Nina Journal, Birds Flyin' High


     A couple of months ago I began an art journal of sorts, these are the next few pages. My first page was used for Altered Eclectics DT so it seems only right that the next instalment should be for them also.
     I got so carried away with these pages that I forgot to take any pictures as I worked, I think you could say I was definitely 'in the zone' on this one. Following a theme has made my first foray into journaling a little easier, I have a rough idea of where I would like this to go.
     Distress inks over white card for the background got me started, then it was on to spritz and splatter for added detail. The doily was done using a stencil and Distress Oxides, as was the sun, these inks cover beautifully and having a mixture of the two types on the page adds to the effect.
     With the addition of birds and flowers the page was really coming together, all I needed to do now was to add the words. For the first few words of the song I used a Dymo tape machine and blue tape, for the repeated words I used some dies, I had to cut and edit them to make the words I wanted but once stuck down you can't see the joins.
     I am getting more adventurous with some of the pages, I have seen some stunning work out there which has given me inspiration, but as a slightly 'contained' crafter I still have a long way to go to let loose the inner creator.
     If you journal, make mixed media, anything but cards and ATC's then please come and join us Altered Eclectics and show us what you've created.


I would like to enter these pages in the following challenges:
We Love 2 Create - Anything Creative Mixed Media
Hiding In My Craftroom - Anything Goes
Crafting With Friends - Anything Goes

Wednesday 26 September 2018

The Male Room Goes Outdoors


     The Male Room is going for The Great Outdoors as it's theme this fortnight. I was working on something else for this but it wasn't quite right so I have gone for a winter outdoors card.
     The coloured circle is made using Izink droppers on acetate, I dropped on a few spots of blue, purple and turquoise and squashed it with another sheet of acetate, then pulled them apart to get this amazing pattern.
     The trees are stamped in black on to a white card square and the edge coloured with Distress ink. Sticking acetate can be really tricky so I put double sided sticky over the whole sheet and then die cut the circle, it stuck down perfectly with no sign of how it was attached.
     Using a stencil and some Izink texture paste I added the snowflakes, once the stencil was removed I sprinkled iridescent glitter over the white paste.
     All that was left was to mount the panel on purple card and then on a white card blank. It has no greeting on the outside but I rather like it like that, I will just have to make sure the one inside is rather grand.
     Please pop over to The Male Room and have a look at all the DT inspiration, there are some great ideas to get your creativity going.


I would like to enter this card in the following challenges:
A Snowflakes Promise - Anything Christmas Goes
Addicted To Stamps - Christmas Comes Early
The Holly and Ivy - Anything Christmas

Wednesday 12 September 2018

Geometric Blues


     The Male Room has a Geometric theme this fortnight, this one really had me rummaging through my stash.
     I wanted to stamp but couldn't find what I was thinking of, but I did have a small die of a geometric shape, so why not cut my own stamp?
     Using a small piece of thin foam I cut my shape, then stuck it to an acrylic block with a glue stick, one home made stamp.
     Using all the blue Distress Oxides I could find I then stamped all over an A5 piece of thin card. The original idea was to use the bit I liked best, but I ended up using the whole piece to cover an A6 white card blank. I have learnt when doing this to stick the front first, fold the card and then stick the back so it doesn't split when folded.
     With a small piece of silver mirri card I cut two shapes with the same die, this die has a thin outer frame that cuts at the same time so I stuck that flush to the card but stuck the main shapes on foam pads. The greeting was then added to the top shape.
     There's lots of inspiration over at The Male Room so please pop over and have a look, then come and join us with your geometric project.


I would like to enter this card in the following challenges:
heARTful Stamping - Anything Goes + A Stamp   (Top3)
Crafting From The Heart - Anything Goes
Crafty Sentiments - Dies and/or Punches

Monday 10 September 2018

The Gift


      I thought I'd try my hand at a spotlight card and this stamp seemed a good one to try it with, it's from Chocolate Baroque, called The Gift.
         This was stamped on card suitable for alcohol markers using Memento black ink. I drew around the bauble die I was going to use so that I only coloured enough for that shape and not the complete picture.
     I trimmed and mounted the main image panel on Stix2 gold pearl card, then die cut the bauble from the coloured card. Mounting this on foam pads and adding some gold thread to the hanging loop it was stuck on to the image panel.
     This layer was then mounted on a green pearl mat before going on a 5x7 white card blank. I have used a peel off greeting because I knew if I heated anything once it was all stuck together it would buckle, next time I will add the greeting before mounting.


Materials list - available from your  local craft shop
Stix2 Anything -    Pearlescent Card - Gold
                             Tinted Card - Holly Green
                             Double Sided Tape
                             Foam Pads
                             PVA Glue
                             7x5 Card Blank

Other items -        Chocolate Baroque stamp - The Gift
                             Memento - Tuxedo Black
                             Alcohol markers
                             Bauble die
                             White Card suitable for alcohol markers


I would like to enter this card in the following challenges:
The 12 Months Of Christmas - Have A Tweet Christmas
The Merry Christmas - Anything Christmas
CraftyHazelnut's Christmas - Anything Christmas

Saturday 8 September 2018

Tags To Die(cut) For


     At Christmas we need tags and for those special gifts we need special tags, what could be more special than handcrafted tags.
     These tags are pre-cut Kraft tags ready to be decorated and measuring 4.75 x 2.5 inches they are just the right size for some die cuts.
     For the snow I have used the white fabric spray paints, working outside I sprayed from about 18 inches above the tag to get the snowfall effect.   
    The village scene is a new die from Sizzix, cut in Stardust card with D/S sticky sheet on the back, one die cut will fit two tags. The greetings are also Sizzix dies and they are cut from Silver Tinted card stuck down with PVA glue.
     To get the silver edge I used a Stix2 2in1 glue pen, running it along the edge and smudging it with my fingers to make it random. The next step was to go over the edges with silver transfer foil which sticks perfectly to the glue.
     All that remained was to find some ribbon to add a splash of colour to a very neutral tag. These would look good on parcels wrapped in plain brown paper stamped with a very simple tree image and tied up with red and white bakers twine.

Materials list - available from your local craft shop
Stix2 Anything -    Stardust Card - White
                             Tinted Card - Silver
                             Shiny Transfer foil silver
                             Kraft Tags
                             2in1 Glue Pen
                             PVA Glue
                             Fabric Spray - White

Other items -        Sizzix Thinlit Dies - Landscape Border, TH Holiday Words
                             Ribbon


I would like to enter these tags in the following challenges:
Southern Girls - Tag, You're It
ABC Christmas - S for snow/T for teal
The Holly and Ivy - Anything Christmas

Wednesday 5 September 2018

Getting A Head For Christmas


     This little deer is made using a Sizzix die and some gorgeous pearlescent card from Stix2, he will fit in a standard C6 envelope.
     One head was cut from Bronze card and the other from Tinted Cream, the cream one allows you to write your message inside with a standard pen.
     The antlers were cut in Copper and stuck onto the back of the Bronze head, while the muzzle, eyes and ears were cut from Oyster, eyeballs from Bronze and the nose from Red Fever and stuck on the front.
     The cream head was stuck at the top only to form the tent opening, I found just below the ears looked about right. To make it stand up I cut the bottom straight across with a sharp knife, going through both layers so it was even front and back.
     His nose has a shiny red foil dot made using a 2in1 glue pen and transfer foil, a small white pen dot on each eyeball makes them look shiny too.
    Made as a card or as a special gift tag I think this little chap is going to be a real winner this Christmas.


Materials list - available from your  local craft shop
Stix2 Anything -    Pearlescent Card - Copper, Bronze, Oyster Shell, Red Fever
                             Tinted Card - Cream
                             Shiny Transfer foil red
                             2in1 Glue Pen
                             PVA Glue
                             
Other items -        Sizzix Bigz Die - Reindeer #4
                             

I would like to enter this card in the following challenges:
Jingle Belles - Shape Up
The 12 Months Of Christmas - Anything Christmas/optional Tweet Christmas
The Holly and The Ivy - Anything Christmas
Merry Christmas - Anything Christmas

Saturday 1 September 2018

Colourful House Of Cards


    A new month means a new challenge at the House Of Cards, this time our theme is birthday and/or the colour swatch.
     I wanted to try and get the strips of colour down my card like the ones in the photo, so I raided my stencil stash and found a bubble one by Dutch Doobadoo that was just right.
     Then came the colours, no ones that I would go for normally but that's what a challenge is all about so Distress Oxides to the rescue. Using a finger dauber I coloured the strips of bubbles, making sure not to cross contaminate the colours.
     The letters are die cut in dark brown pearl card, using a narrow ruler for a guide I stuck them on to fit diagonally across the card. I also had a search through my gems and accents draw and came up with some enamel accents that almost match the inks, a few placed here and there and the front panel was complete.
     The panel has a narrow mat layer in the same dark brown card as the letters, stuck on to a white card blank and all was finished.
     Please come and join us at the House Of Cards with your birthday themed cards, just use the photo and/or the colour swatch to get you started.

September - House Of Cards


I would like to enter this card in the following challenges:
Cardz 4 Galz - Beautiful Backgrounds 
Seize The Birthday - Rainbows


Altered Wooden Stamp Block


     Having bought a stamp press I decided to take some of my rubber stamps off the wooden blocks and remount them on cling foam, now they can be used in the press and take up much less room in storage. What could I do with all the wooden blocks? They looked to useful to be thrown out, Christmas decorations, that's what!
     As we like anything recycled at Altered Eclectics I have used this project as my DT piece, we like mixed media and re-purposed projects but no cards or ATCs.
   After removing my rubber stamps I cleaned up the blocks and sanded them. If you have glue that doesn't want to come off try using Stix2 sticky stuff remover, it works well and doesn't smell as much as white spirit.
    The next step was a couple of coats of white gesso and a coat of white chalk paint.
      Using PVA glue I painted a layer on the block and then added some patterned tissue, smoothed out with a clean brayer to get rid of any air bubbles.
     To add an edge I used the 2in1 glue pen and dabbed it with my finger all around the edge of the block, once it had gone clear I added some silver transfer foil.
      With a hot glue gun and some silicone moulds, kindly supplied by Aldridge Crafts, I made a few crowns, deer and snowflakes.
     Once these were set I popped them out of the moulds and trimmed them with scissors, then painted them with Starlight paints.
     The crown on top is two identical shapes hot glued together, then hot glued to the block. For the deer and snowflakes I used silicone glue so I had a little wiggle room before it set.
     The frosting on the top and sides is Epsom Salts sprinkled over PVA glue, maybe not the best option as it may react in damp conditions but very effective as ice crystals.
     Aldridge Crafts have all of the items used in this project in stock and this sample will be joining them shortly. Jane has used paper clay in some of the moulds which is ideal for light weight crafting and picks out the detail perfectly.
     Please come and join us at Altered Eclectics with your projects, we have lots more inspiration on our blog to help get you started.


I would like to enter this project in the following challenges:
CraftyHazelnut's Christmas Challenge - Anything Christmas  
The Holly and Ivy - Anything Christmas   
As You Like It - Favourite Non Card Project - It's recycling something, no waste
Crimbo Crackers - Anything Goes
Creative Artists Mixed Media - Anything Mixed Media